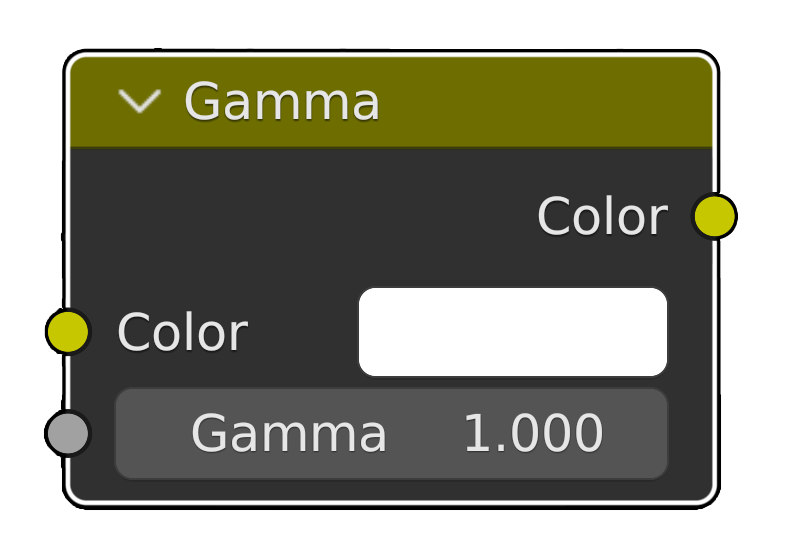
Blender Gamma Node

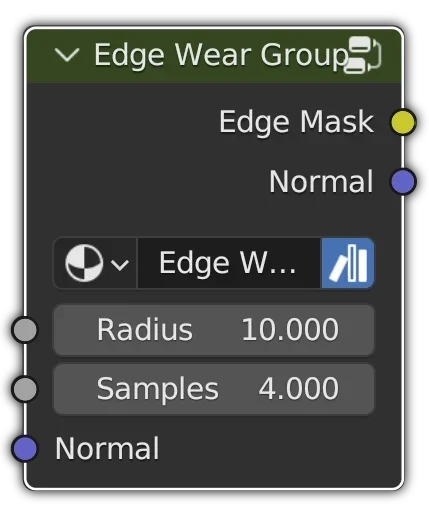
This isn’t intended as a doctrine, just some food for thought For a while now, I have been using the gamma node in Blender as an alternative to the color ramp and the map range node. There are a few reasons why I like the node: It is light weight. It is a simple one slider does all node. The node inputs are easily exposed in a Group. I can use one Image texture easily to drive more than one input - see below....

23 November 2023 · 2 min · Mark
Blender Edge Wear Node

Blender Edge Wear Node

This is a demonstration of how to create a Node Graph in Blender to make and Edge Wear node for use in Cycles. Step one: Create the node graph as shown above in Blender’s shader editor. Note the samples input this will be added next. Step two: Add a Samples input slot, so you can drive the Bevel node samples from outside the group. Step three: TAB out of the node group and then right click on the Samples input and Copy as Driver....

31 July 2023 · 1 min · Mark

Blending Machine Parts

I have recently been watching a YouTube channel from a Japanese machine tool maker, which I find interesting and relaxing. It is also a great source of reference material for 3D modelling. For ideas and materials, I have been making screenshots like crazy as I watch through his demonstrations. If you are interested in checking the channel out it is here: @SwapLampJapan I hadn’t thought of using YouTube as a source of reference but as the quality of the video cameras improve I am able to get some really nice shots for reference....

17 July 2023 · 2 min · Mark

Asset Surface Snapping Blender

When adding mesh assets, for use as a cutter for example, it is important to align the asset to the underlying geometry’s surface normals. This can be achieved by using the following setting in the snap options menu in the tool bar at the top of the Blender UI. This will snap the assets origin, as the center, to the surface of the target mesh, when using the CTRL key or by toggling the snapping option Magnet icon in the menu....

8 May 2023 · 1 min · Mark

Moi3d Shortcuts

A Alt+A = ArrayDir Ctrl+A = script:moi.geometryDatabase.selectAll(); Shift+A = script:moi.view.resetAll(); Shift+Alt+A = ArrayCurve Ctrl+Shift+A = ArrayCircular B B = Fillet Alt+B = sBridge C C = Rebuild Ctrl+C = CopyClipboard Ctrl+Alt+C = ODCopyToExternal Alt+C = script: moi.view.setCPlaneInteractive(); Ctrl+Shift+C = CopyClipboardWithOrigin Shift+Alt+C = script: /* Align CPlane with 3D view 1.0 */ var cp = moi.view.getCPlane(), tp = moi.ui.mainWindow.viewpanel.getViewport('3D').targetFrame, tl = moi.VectorMath.pointsWithinTolerance; if (tl(cp.origin,tp.origin) && tl(cp.zaxis,tp.zaxis)) { moi.view.resetCPlane() } else {moi.view.setCPlane(tp, false)}...

28 April 2023 · 7 min · Mark

Blender Curve Manipulation Problem

If you find you are unable to move a curve handle in all three axis, it is probably due to the curve type being set to 2D. When you create the curve expand the Simple Curve dialog in the lower left of the viewport, or press F9: From here choose 3D and then, if you want curved splines, choose Auto in the Output Curve Type. The defaults are 2D and Vector and they may not be what you want for your curves....

11 April 2023 · 1 min · Mark

Sub-division Models

In recent years, there have been huge improvements in n-gon’s (non quad polygons). Specifically how well they render and games engines handle non triangular or quad polygons – in reality of course, all polygons are reduced to triangles for rendering. Three vertices being the lowest amount of points that are needed to create two dimensional forms. It seems now that the last place that require quad sub-D models is in deformed meshes, character animations and the like....

8 April 2023 · 1 min · Mark

Blender Class Naming Convention

Blender Class naming conventions - Python API As of Blender 2.8 the API naming requirement is for the class name to match the following convention: UPPER_CASE_{TYPE}_mixed_case Where {TYPE} is two letters denoting the class type inherited: HT – Header MT – Menu OT – Operator PT – Panel UL – UI list The class identifier “bl_idname” mast match the class name. Valid class name and identifier examples: class ADDONNAME_OT_my_operator(bpy.types.Operator): bl_idname = 'ADDONNAME_OT_my_operator' ....

19 October 2022 · 1 min · Mark

Backface Culling in Blender

Backface culling in Blender is set in two places, for solid view and for material view: Solid View In messageSolid view, i.e. Matcap, Studio etc. it is set from the topbar dropdown as shown below: Material View In Material view, i.e. EVEE is it set in the shader panel on the right, as shown below: Advantages Using backface culling allows the user to see through the backside of geometry. This is handy for looking at the bottom of objects, through a ground plane for example....

3 October 2022 · 1 min · Mark

Empty Pie Menu Blender

This is the basic structure of a Pie Menu in Blender using Python import bpy from bpy.types import Menu, Operator bl_info = { "name": "", "author": "", "version": (0, 0, 0, 1), "description": "", "blender": (2, 80, 0), "category": "3D view" } class VIEW3D_MT_PIE_template(Menu): # label is displayed at the center of the pie menu. bl_label = "Operations" bl_idname="mesh.mypie" def draw(self, context): layout = self.layout pie = layout.menu_pie() pie.operator("auto.smooth") ​ def register(): ​ bpy....

12 June 2021 · 1 min · Mark